This is a test to understand how PUM works and what are the different
pieces involved.
Workstation/Laptop config
Windows 7 Enterprise, 64bit OS, 12GB RAM, 237GB HDD
EP92P005 - Patch 17965081: PEOPLESOFT FSCM IMAGE 9.2.005
zip files expanded – 25GB
.ova file – 25GB
So total disk space used before even creating appliance = 75GB
Both VMs once up and running take around 90 GB
FSC92DMO (target) - FSCM 9.2, Demo, PT 8.53.04
If target and PI are at different minor tools release, then run client install from the higher tools release (8.53.09) and then install PSCA running at tools rel 8.53.09. Basically take whatever comes with the PI environment, as that would generally be latest and greatest.
Update the environment long and short name in the following page before starting any agents.
PeopleTools > Utilities > Administration > PeopleTools Options
http://192.168.56.103:8000/ps/signon.html

C:\apps\PT853\ is where the workstation install of PT 8.53 and 09 patch was done
Y:\ is mapped to the pi_home share of the PI environment.
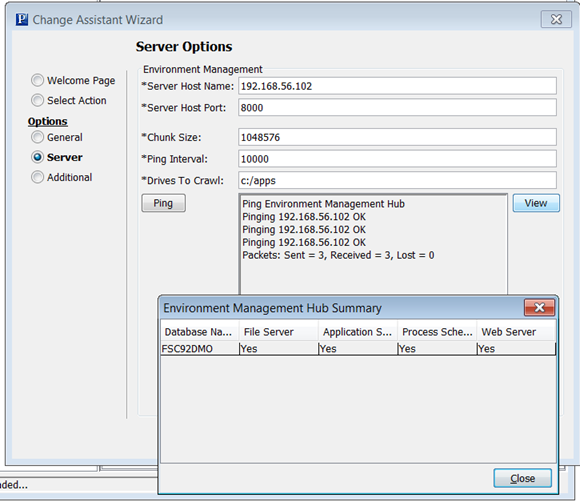
Click Next and then Finish on the confirmation screen.

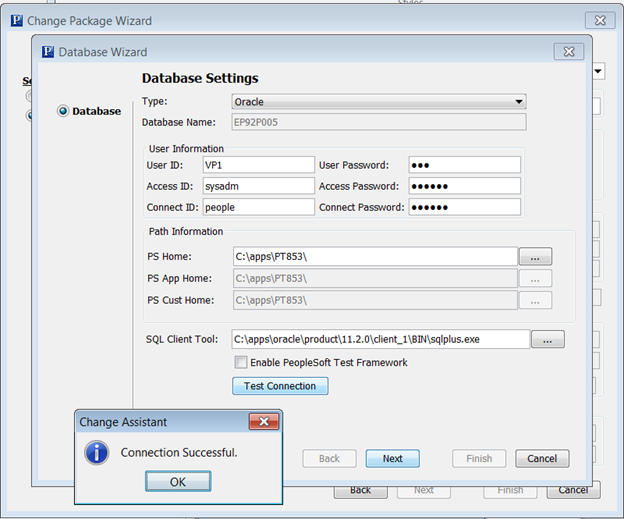
Click Next to view the confirmation screen and then Click on Finish which will take you back to the following screen
Key in the URL to the PI environment.
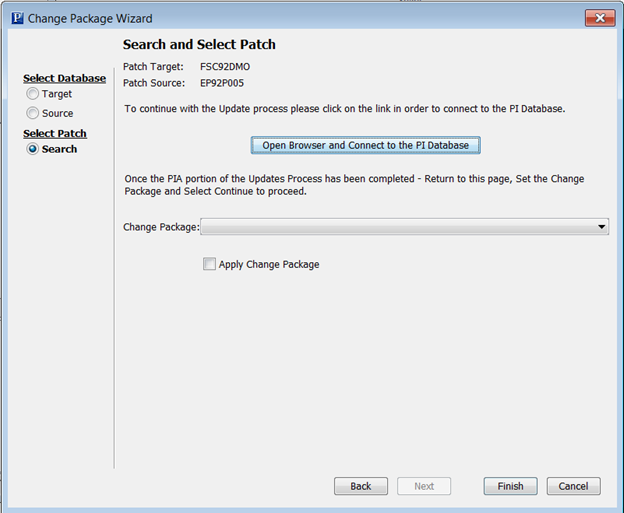
Signon page pointing to the PI Image URL opens up. Rest of the steps are now done within PIA and we will come back to this page to apply the change package which will be created in your PIA session.
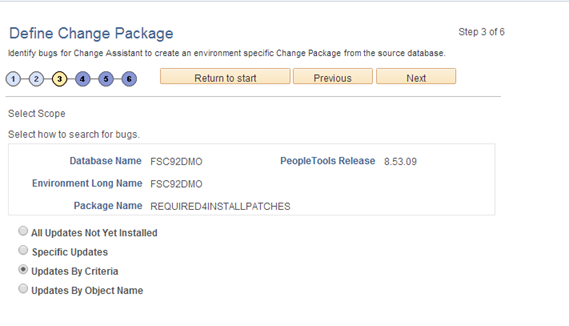
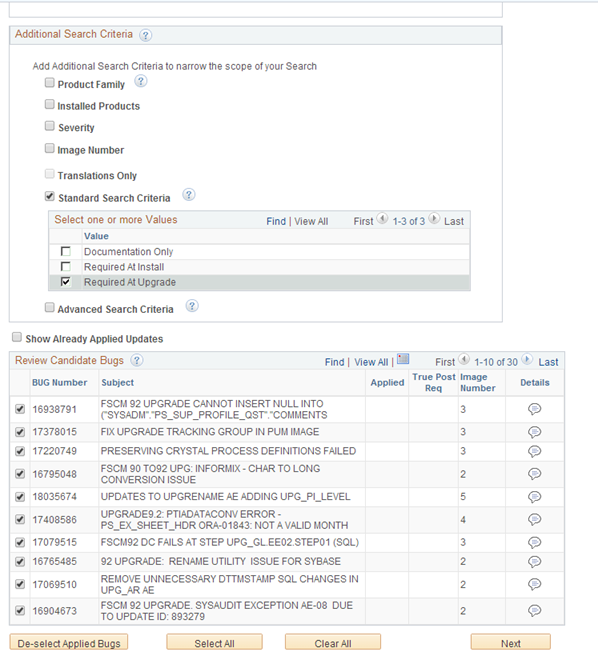
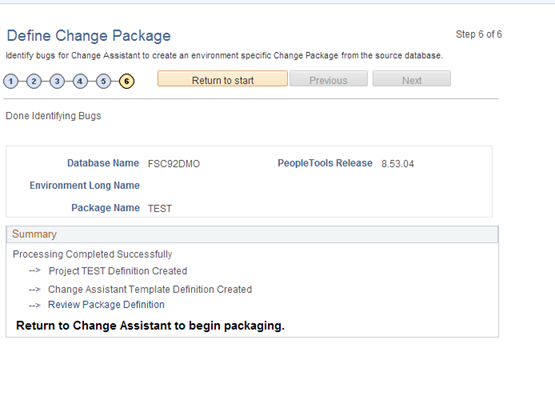
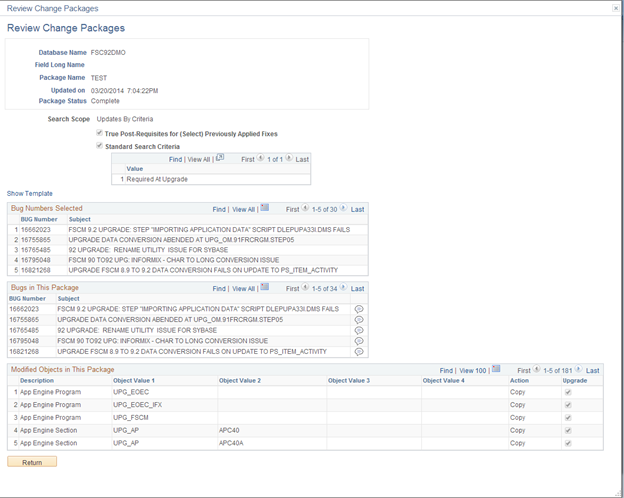
Now back in PSCA.
Workstation/Laptop config
Windows 7 Enterprise, 64bit OS, 12GB RAM, 237GB HDD
VM Details
FSC92DMO - Patch 16877487: PEOPLESOFT FSCM IMAGE 9.2.001EP92P005 - Patch 17965081: PEOPLESOFT FSCM IMAGE 9.2.005
Disk Space Details
zip files – 24.5GBzip files expanded – 25GB
.ova file – 25GB
So total disk space used before even creating appliance = 75GB
Once .ova file is created the expanded files can be deleted.
The .ova file can be deleted once the VM is up and runningBoth VMs once up and running take around 90 GB
Environments
EP92P005 (PI) - FSCM 9.2 Image #5, PT 8.53.09FSC92DMO (target) - FSCM 9.2, Demo, PT 8.53.04
If target and PI are at different minor tools release, then run client install from the higher tools release (8.53.09) and then install PSCA running at tools rel 8.53.09. Basically take whatever comes with the PI environment, as that would generally be latest and greatest.
Update the environment long and short name in the following page before starting any agents.
PeopleTools > Utilities > Administration > PeopleTools Options
I am starting FSC92DMO VM first and then the EP92P005. As Dynamic IP
addressing option has been chosen, the first one has 192.168.56.102 and the
next one 103.
Verify App Designer, SQL Developer and web connectivity to both envs.
http://192.168.56.103:8000/ps/signon.html
EMHUB/Agents
Logged into FSC92DMO VM, su in as psadm1, updated PSEMAgent config URL to
http://192.168.56.102:8000/PSEMHUB/hub
and Unix drives to crawl to /opt/oracle|/home/psadm2
Rename the delivered search-results.xml file to search-results-old.xml
and then start the agent in the background as follows.
./StartAgent.sh &
Did a local client install under c:\apps\PT853. Updated the PSEMAgent config file here also to point to http://192.168.56.102:8000/PSEMHUB/hub
and windows drives to crawl set to C:/apps/PT853|C:/apps/oracle
Started the agent as an administrator.
Start PSCA

C:\apps\PT853\ is where the workstation install of PT 8.53 and 09 patch was done
Y:\ is mapped to the pi_home share of the PI environment.

EMF Agent is running on target which is FSC92DMO. I have one agent
running on the Linux VM. So it found App/Prcs and Web. For File Server Linux is
not a certified option, which is why I have a local install of PeopleTools
which acts as the file server.
Additional Options - no changes took defaults
Click Next and then Finish on the confirmation screen.
Now file server section is automatically filled out.
Key in the db name and once you tab out the following screen appears

Click Next to view the confirmation screen and then Click on Finish which will take you back to the following screen
Key in the URL to the PI environment.

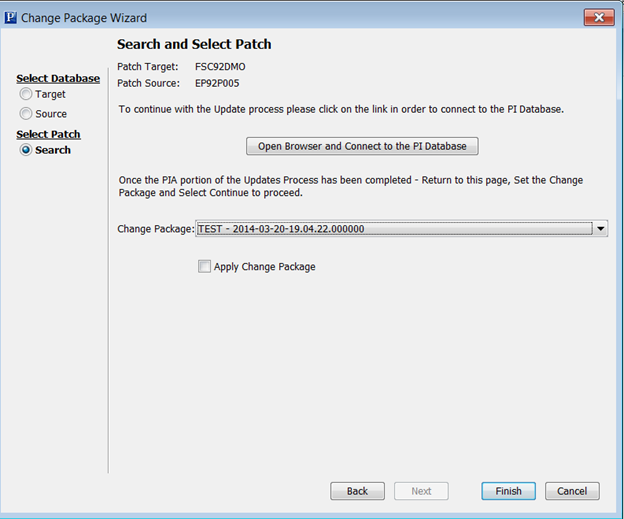
Examine Patch Target and Source db info as displayed above.
Now click on the “Open Browser and Connect to the PI Database” button.Signon page pointing to the PI Image URL opens up. Rest of the steps are now done within PIA and we will come back to this page to apply the change package which will be created in your PIA session.

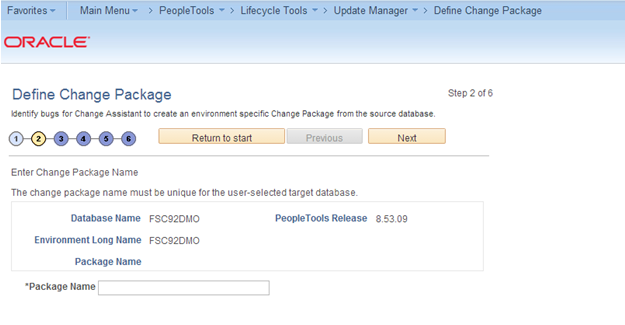
Step 1 is automatically grayed out, as we only have one target db in
this case.
Provide a Package name and click next

So there are 30 patches that need to be applied


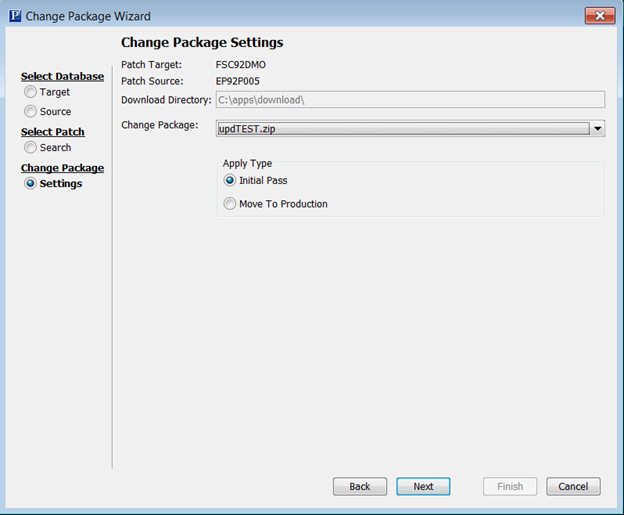
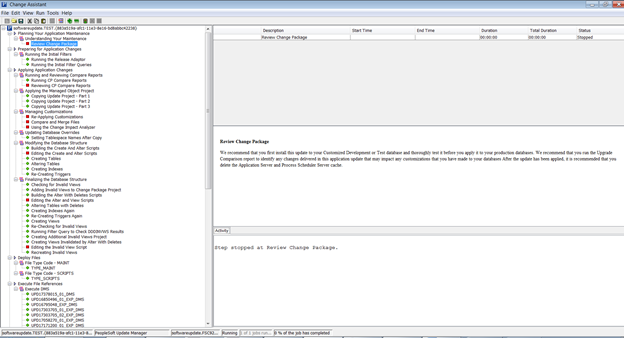
Now back in PSCA.


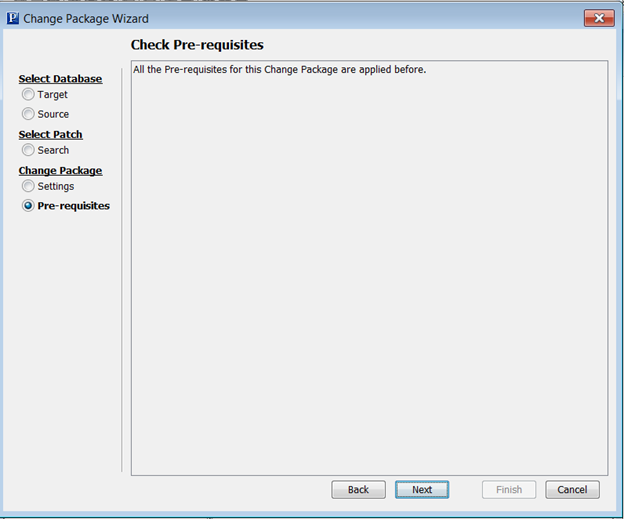
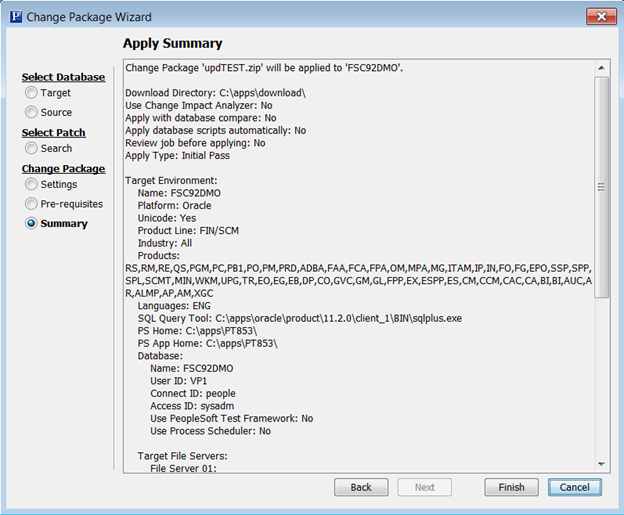
Now begin applying this patch as normal.


This comment has been removed by a blog administrator.
ReplyDelete