In this POC I am upgrading HCM 9.1 PT 8.53.x to HCM 9.2 PT 8.56.x
VM setup
PSCA/Oracle Client/PT Client Setup
I am running my PSCA on the App/Prcs VM mentioned above.
Map drives to E$ on PUM25, UPG03 and \\PUM25\E$\psft\pt\hcm_pi_home
Installed SQL Server Management Studio and related drivers for SQL Server 2014.
Opened CMD as admin and navigated to \\PUM25\E$\psft\pt\tools_client and ran SetupPTClient.bat -t
This will install Oracle client and Oracle based PT Client on the C:\ drive. This PT Client will be used to connect to PUM25 and/or UPG03.
Also installed PSCA - default location on C:\ drive.
Created 32-bit and 64-bit ODBC connections for my copy of prod database. PT 8.53 just needs 32-bit but when PSCA makes the connectivity test it uses 64-bit version.
Verified that I can connect to PUM24, UPG03 and Copy of Prod via application designer as well as the appropriate SQL tool.
PSCA Configuration
Launch PSCA as admin
Select Update Manager
General Option
- PS_HOME - point it to the local install ps_home
- Create local directories to store download, output and staging and point them appropriately
- point to SQLCMD.EXE file for SQL Query Tool
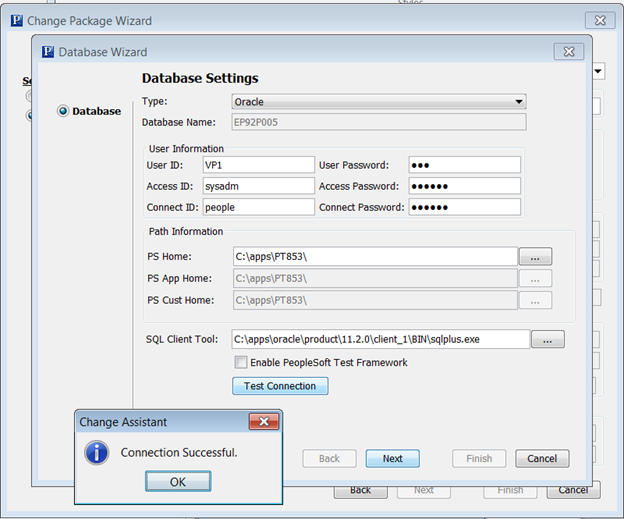
PUM Source - point to the Oracle db, SQL Client Tool would be path to sqlplus.exe, PS_HOME, PS_APP_HOME and PS_CUST_HOME would be the Oracle PT client installed in the prior step.
Don't have to enable any check-boxes
PI_HOME - will be the mapped drive to hcm_pi_home mapped earlier
PIA URL to PUM signon page
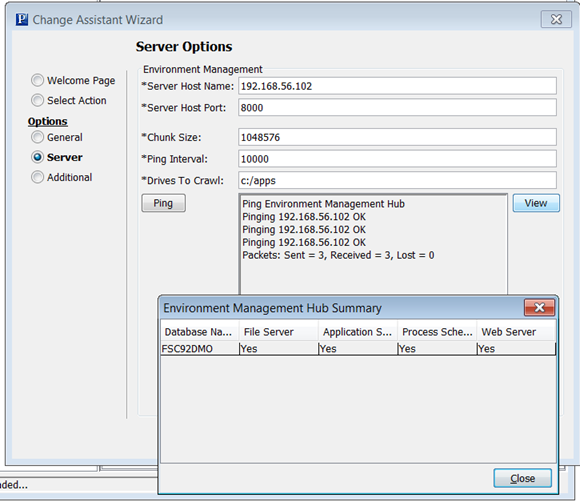
Did not enable EM Hub
Upload Upg Source db to PUM
Launch the "Upload Target Database Information to Image" option and select the Upgrade Source database and upload that to the PUM Image.
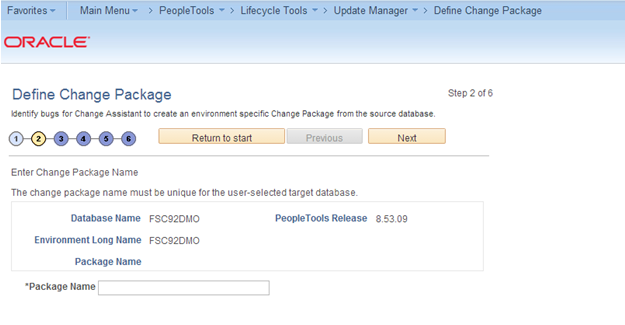
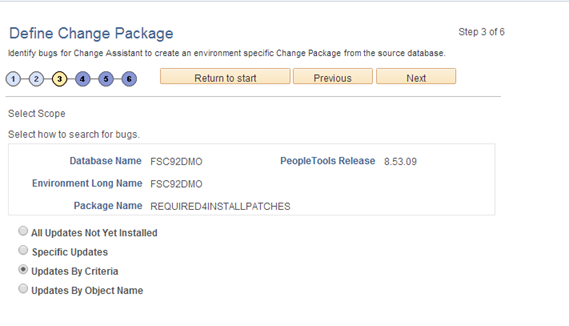
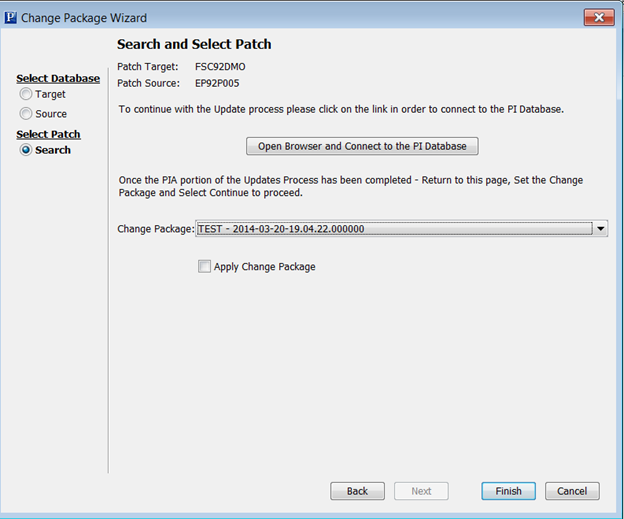
Once done login to PUM PIA, navigate to PeopleTools > Lifecycle Tools > Update Manager > Update Manager Dashboard and Click on Define Upgrade Package.
Named my package HR91TO92.
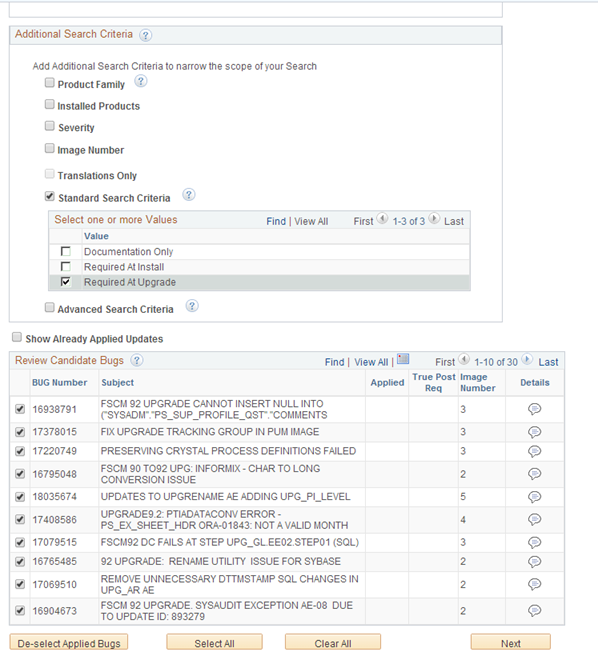
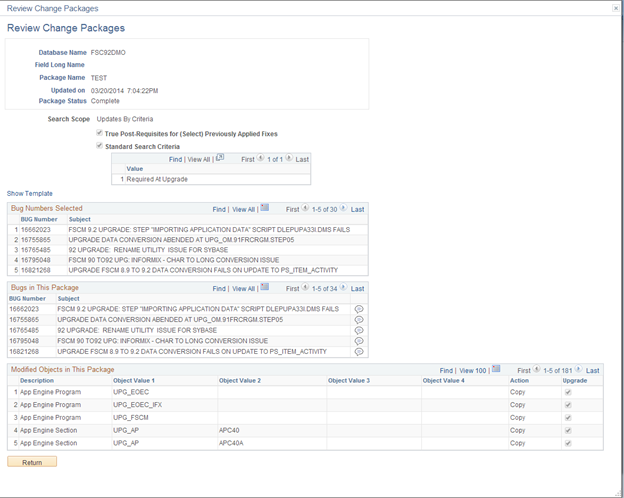
Follow prompts select required for upgrade fixes too.
So it should create HR91TO92UPG and HR91TO92RFU.
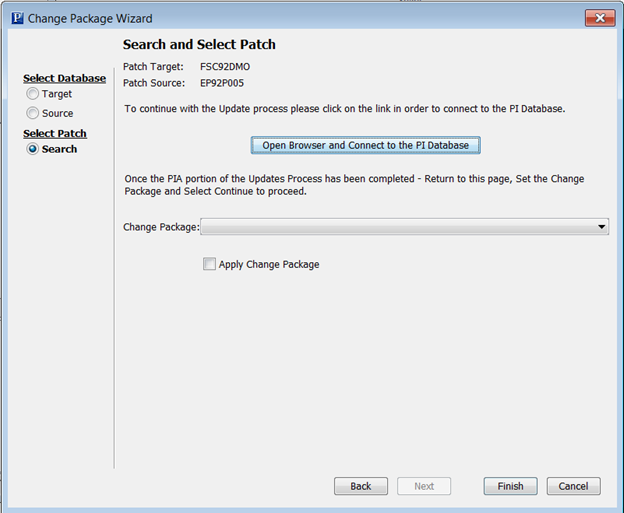
Now back in PSCA, Select HR91TO92UPG from the drop-down and it should prompt for downloading HR91TO92RFU too. So download both packages to the download directory.
As we will doing a tools upgrade too at the same time, copy PS_HOME\PTU\updPTU856.zip to the download folder manually.
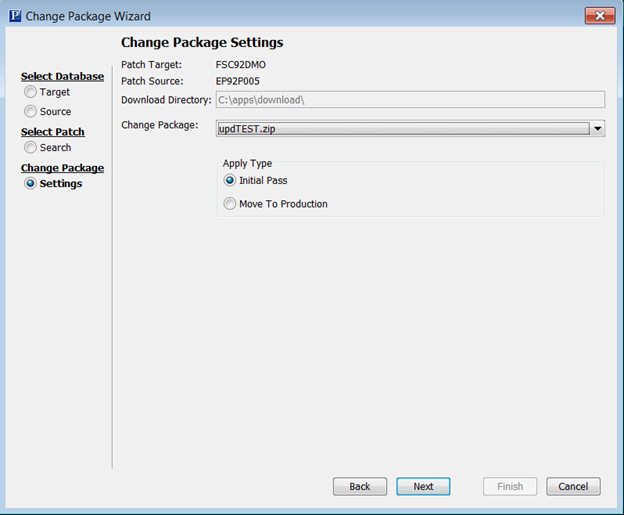
Selected "Upgrade to New Application Release"
Initial Pass is selected by default
Setup target database - copy of prod
SQL Client tool - will be path to SQLCMD.EXE
Current home - will be the copied hr91 directory, I have one directory which has both tools and app so provided the same path for PS_HOME, PS_APP_HOME and PS_CUST_HOME
Enabled Configure New Homes for Upgrade
Provided paths for new homes the ones created by the DPK install on this VM.
Setup Upgrade Source database - this is similar to the PUM Source database configuration done earlier.
Select Upgrade page - should show Upgrade Source and target information correctly. Application and Tools upgrade sections will be selected and grayed out. Each one should have a package listed under the appropriate section.
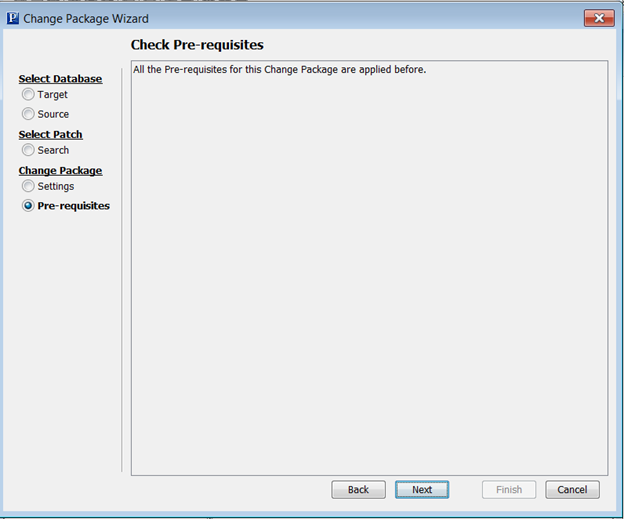
Select the Required for Upgrade Package section.
then continue to compatibility check screen. Verify that all are return green. If anything is not then step through previous screens to verify the inputs and selections. A total of 11 checks are performed.
VM setup
- I have done native OS installs on Windows 2016 VM of PUM Image 25 (VM name: PUM25) and Upgrade Source 03 (VM Name: UPG03) and those systems are up and running.
- Next I have copy of production up on SQL Server 2014 on a Windows 2016 VM. (VM Name: DB).
- I have two other Windows 2016 VMs one for App/Prcs VM and the other for PIA. Native OS - DPK method install of middleware like tuxedo, weblogic and tools, app homes using the command line psft-dpk-setup.bat --env_type midtier --deploy_only --deploy_type all
- Software is installed on E:/psft (E:\ is local drive on the VM)
No domains have been deployed yet
PSCA/Oracle Client/PT Client Setup
I am running my PSCA on the App/Prcs VM mentioned above.
Map drives to E$ on PUM25, UPG03 and \\PUM25\E$\psft\pt\hcm_pi_home
Installed SQL Server Management Studio and related drivers for SQL Server 2014.
Opened CMD as admin and navigated to \\PUM25\E$\psft\pt\tools_client and ran SetupPTClient.bat -t
This will install Oracle client and Oracle based PT Client on the C:\ drive. This PT Client will be used to connect to PUM25 and/or UPG03.
Also installed PSCA - default location on C:\ drive.
Created 32-bit and 64-bit ODBC connections for my copy of prod database. PT 8.53 just needs 32-bit but when PSCA makes the connectivity test it uses 64-bit version.
Verified that I can connect to PUM24, UPG03 and Copy of Prod via application designer as well as the appropriate SQL tool.
PSCA Configuration
Launch PSCA as admin
Select Update Manager
General Option
- PS_HOME - point it to the local install ps_home
- Create local directories to store download, output and staging and point them appropriately
- point to SQLCMD.EXE file for SQL Query Tool
PUM Source - point to the Oracle db, SQL Client Tool would be path to sqlplus.exe, PS_HOME, PS_APP_HOME and PS_CUST_HOME would be the Oracle PT client installed in the prior step.
Don't have to enable any check-boxes
PI_HOME - will be the mapped drive to hcm_pi_home mapped earlier
PIA URL to PUM signon page
Did not enable EM Hub
Upload Upg Source db to PUM
Launch the "Upload Target Database Information to Image" option and select the Upgrade Source database and upload that to the PUM Image.
Once done login to PUM PIA, navigate to PeopleTools > Lifecycle Tools > Update Manager > Update Manager Dashboard and Click on Define Upgrade Package.
Named my package HR91TO92.
Follow prompts select required for upgrade fixes too.
So it should create HR91TO92UPG and HR91TO92RFU.
Now back in PSCA, Select HR91TO92UPG from the drop-down and it should prompt for downloading HR91TO92RFU too. So download both packages to the download directory.
As we will doing a tools upgrade too at the same time, copy PS_HOME\PTU\updPTU856.zip to the download folder manually.
Selected "Upgrade to New Application Release"
Initial Pass is selected by default
Setup target database - copy of prod
SQL Client tool - will be path to SQLCMD.EXE
Current home - will be the copied hr91 directory, I have one directory which has both tools and app so provided the same path for PS_HOME, PS_APP_HOME and PS_CUST_HOME
Enabled Configure New Homes for Upgrade
Provided paths for new homes the ones created by the DPK install on this VM.
Setup Upgrade Source database - this is similar to the PUM Source database configuration done earlier.
Select Upgrade page - should show Upgrade Source and target information correctly. Application and Tools upgrade sections will be selected and grayed out. Each one should have a package listed under the appropriate section.
Select the Required for Upgrade Package section.
then continue to compatibility check screen. Verify that all are return green. If anything is not then step through previous screens to verify the inputs and selections. A total of 11 checks are performed.
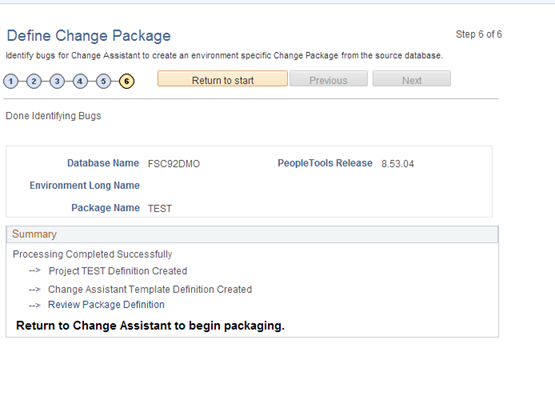
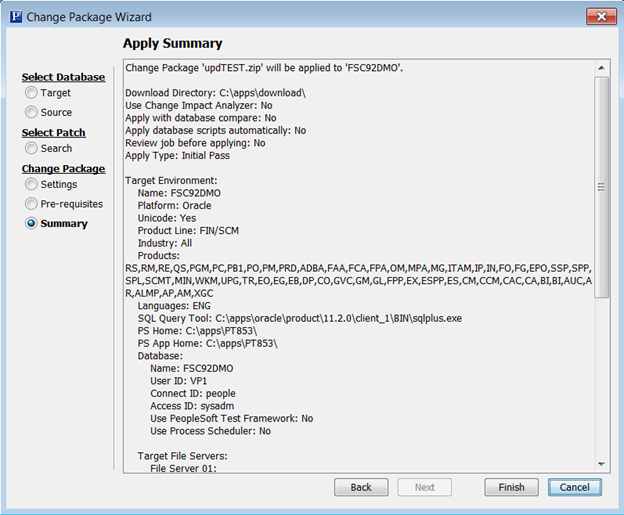
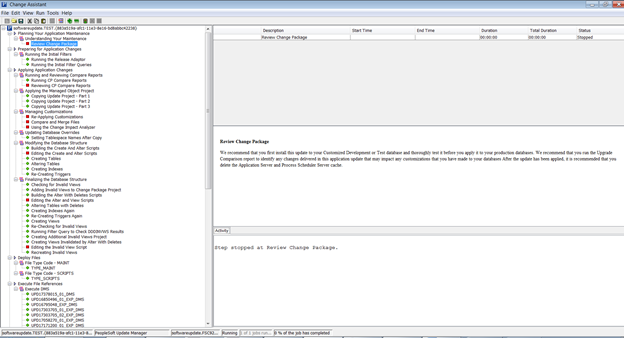
Click on Finish and the upgrade job will be created and PSCA
will start running the steps. The first step is a manual stop.
It creates 3 jobs, RFU, UPG and PT Upgrade.