PeopleSoft (Oracle) with the advent of 9.2 release introduced the PUM tool to apply and migrate patches/bundles/fixes. Going forward an individual patch or fix is now called as PRP (PeopleSoft Release Patchset).
So in a nutshell the process is to download the PRP, apply it to the current Image (which means you might have to first download and get the latest version of the PUM Image up and running) and then apply it to your Demo (this might be optional) continued with applying the PRP to your DEV, TST/QA and finally Production.
I have covered some basic steps on how PUM works in the post here.
Pre-reqs
I had to install the latest PeopleTools client which came with the Image 10. Also had to install Oracle 64 bit client. Mapped the pi_home share to a drive on my workstation. Make sure pi_home is writtable. For making it writtable do the following
1. Navigate through wizard (Tools > Change Action)
2. Selection Action would be Update Manager
3. On the General tab, select PS_HOME. For this example I am working on FSCM Image 10, running on tools 8.54.05. So I installed the client from the PUM image share to my local drive under C:\PT85405. Designated a download, staging and output directory. Assigned path to Oracle client. Had to install the 64 bit version which was delivered part of the image share.
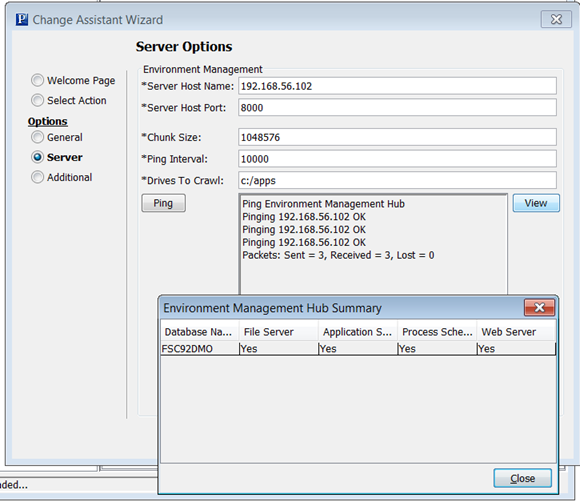
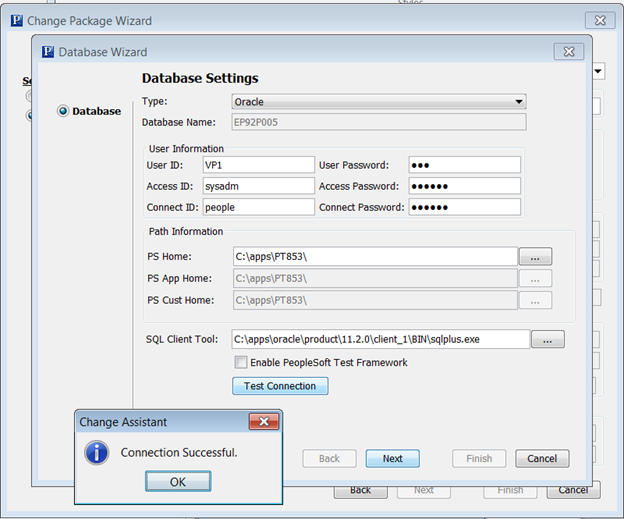
4. PUM Source tab - stepped through the wizard and made sure connection successful. Mapped the share to a drive on my workstation. \\image_ip_address\pi_home
5. EM Hub tab - pointed it to my demo db. My Demo db is running FS 9.2, PT 8.53.14 on SQL Server 2012
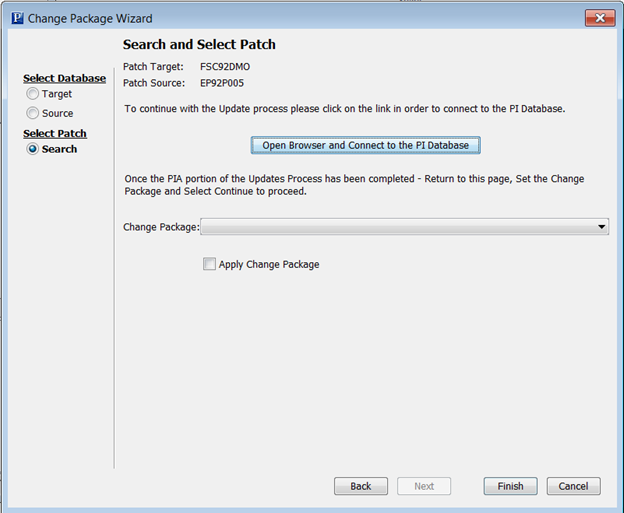
6. On Select Tab - selected "Apply downloaded PeopleSoft Release Patchset to PeopleSoft Image".
So now the current wizard is complete and the next one pops-up.
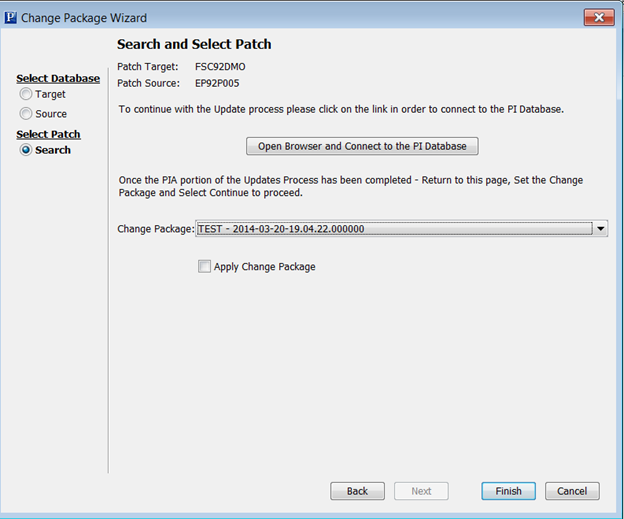
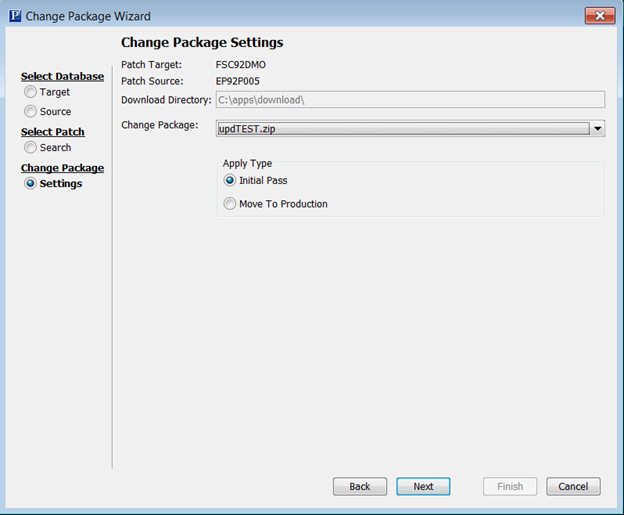
1. Select download directory where you downloaded the zip file from Oracle's website
2. PSCA will only show applicable patches if your download directory contains other zip files. Select and move on.
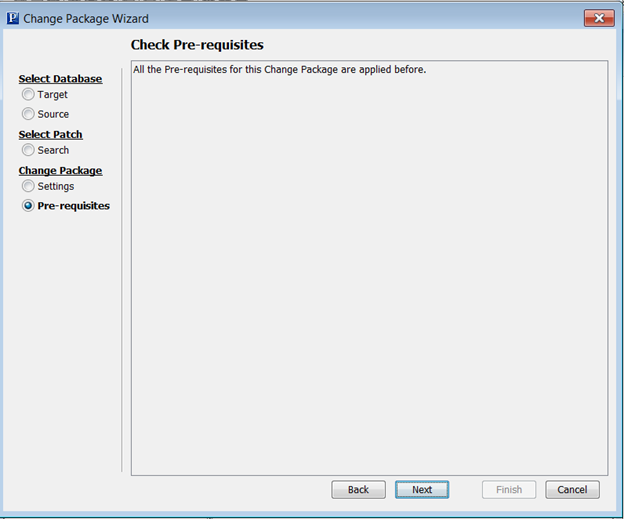
3. Compatibility check should run to success.
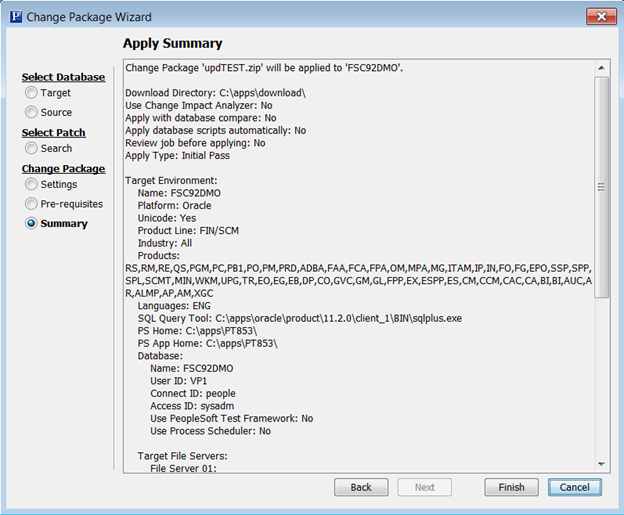
4. Apply summary - eye ball and make sure everything looks right.
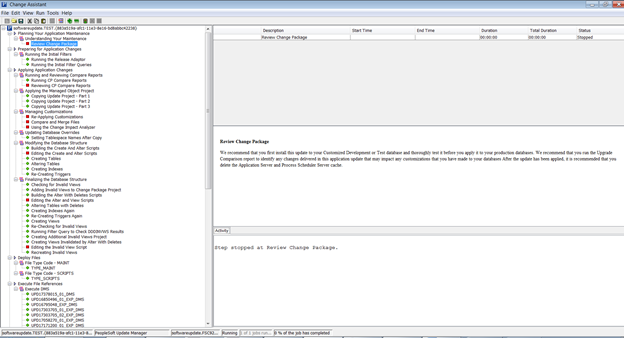
PSCA will create a job and start applying the project to the Image db. Verify logs once done.
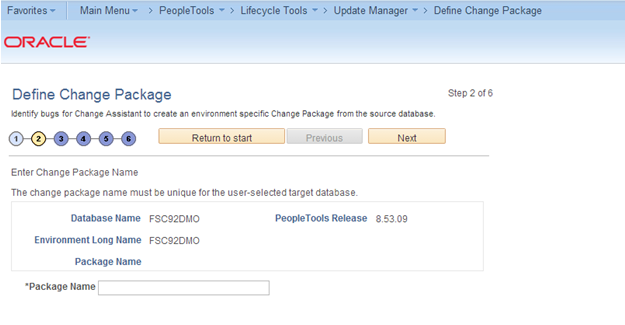
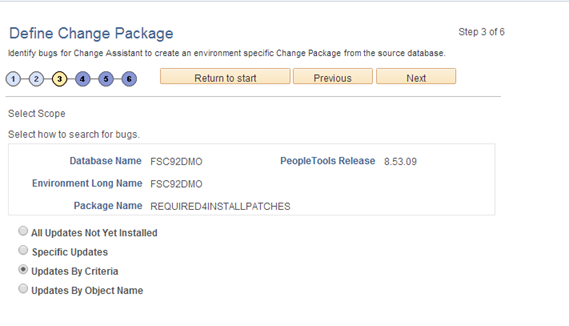
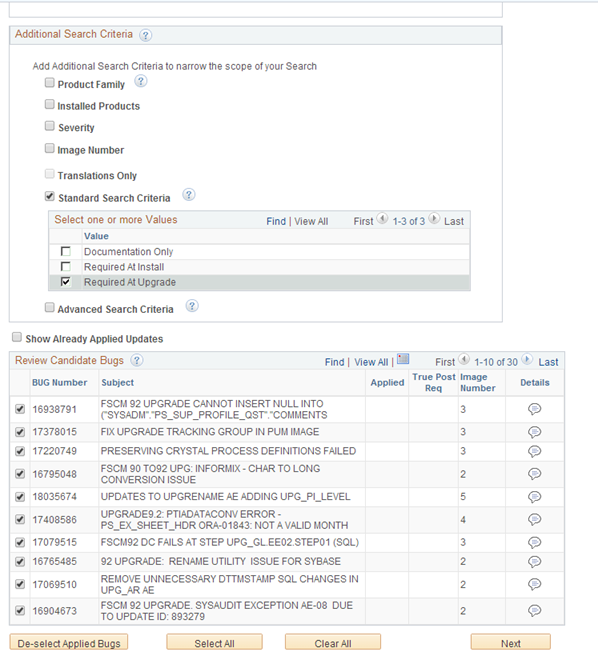
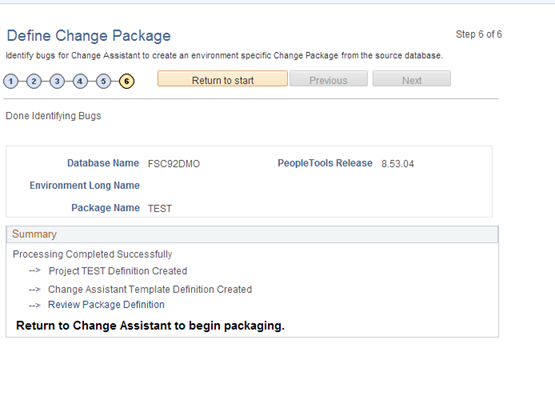
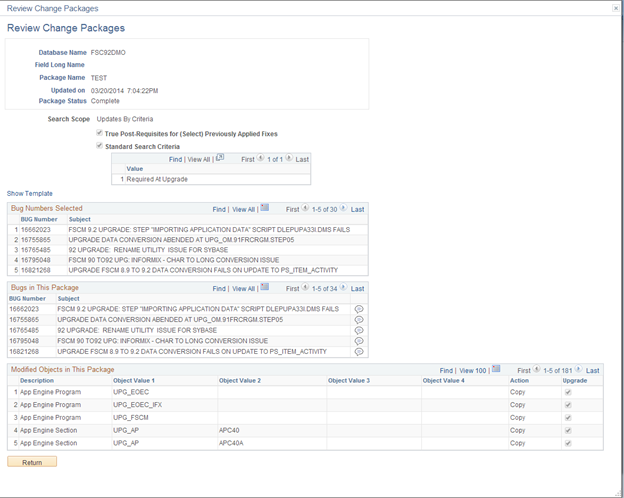
Login to the Image 10 PIA and navigate to PeopleTools > Lifecycle Tools > Update Manager > Define Change Package. I have already uploaded my demo db to this Image 10 db. (definitely another post on that to follow). Provide a package name, select "Specific Updates" radio button, provide bug number and finish creating the package.
So prior to 9.2 this was a simple step, search for patch on Oracle website, download and apply to demo, but now its very very elaborate. Come to terms, no other way out !!
I have covered some basic steps on how PUM works in the post here.
Pre-reqs
I had to install the latest PeopleTools client which came with the Image 10. Also had to install Oracle 64 bit client. Mapped the pi_home share to a drive on my workstation. Make sure pi_home is writtable. For making it writtable do the following
Edit the
/etc/samba/smb.conf file
Before >> guest account = nobody
After >> guest account = root
Under the [pi_home]
section
Before >> writable = no
After >> writable = yes
Restart samba service
as below
service smb restart
Map a drive and when prompted
for credentials provide
workgroup\root as the username and root’s
password as the password1. Navigate through wizard (Tools > Change Action)
2. Selection Action would be Update Manager
3. On the General tab, select PS_HOME. For this example I am working on FSCM Image 10, running on tools 8.54.05. So I installed the client from the PUM image share to my local drive under C:\PT85405. Designated a download, staging and output directory. Assigned path to Oracle client. Had to install the 64 bit version which was delivered part of the image share.
4. PUM Source tab - stepped through the wizard and made sure connection successful. Mapped the share to a drive on my workstation. \\image_ip_address\pi_home
5. EM Hub tab - pointed it to my demo db. My Demo db is running FS 9.2, PT 8.53.14 on SQL Server 2012
6. On Select Tab - selected "Apply downloaded PeopleSoft Release Patchset to PeopleSoft Image".
So now the current wizard is complete and the next one pops-up.
1. Select download directory where you downloaded the zip file from Oracle's website
2. PSCA will only show applicable patches if your download directory contains other zip files. Select and move on.
3. Compatibility check should run to success.
4. Apply summary - eye ball and make sure everything looks right.
PSCA will create a job and start applying the project to the Image db. Verify logs once done.
Login to the Image 10 PIA and navigate to PeopleTools > Lifecycle Tools > Update Manager > Define Change Package. I have already uploaded my demo db to this Image 10 db. (definitely another post on that to follow). Provide a package name, select "Specific Updates" radio button, provide bug number and finish creating the package.
So prior to 9.2 this was a simple step, search for patch on Oracle website, download and apply to demo, but now its very very elaborate. Come to terms, no other way out !!